Etsy Photography Guide: 5 Tips, 5 Common Mistakes and Numerous Tricks
What is the first point that grabs your interest when you visit an e-commerce site? Probably your answer is product photos, right? Because, images are processed 60,000 times more rapidly than text, and it takes twice as long to process and recognize words. It is also a proven fact for your Etsy shoppers.
Therefore, you have only one chance to draw Etsy buyers’ attention and arouse curiosity in order to encourage them to visit your shop, which is product photography.
Thus, discover this Etsy Photography Guide, which is backed by tips, tricks, and common mistakes, and take your chances. Keep on reading and learn “how to take photos for Etsy? ”
5 Tips for Etsy Photography
Nobody is born a master photographer. However, that does not mean you can not take pictures with striking imperfections.
What you need to do is to have quality photography equipment, grasp the details of taking pictures with the tips described in this guide, and combine them with Etsy photography rules. Don't be intimidated, we'll start right away.
💡 Need to Know: Ultimate Guide to Etsy Product Photo Size
1. Discover the Types of Product Photography
Different types of product photography will require diverse approaches to showcase the product since each one has its own characteristics. For instance, some items are sold separately, while others are promoted in bulk on Etsy.
Packaging is very important as some products are fragile or valuable. Since some products are too small or large, this should be reflected in the photo to the customer.
For these reasons, you should master how to take photos properly for which product by exploring various shots.
1.1. Detail shot: Close up images to spotlight features
Detail shots are a closer image of the item. This helps shoppers comprehend and appreciate the finer details of your product.
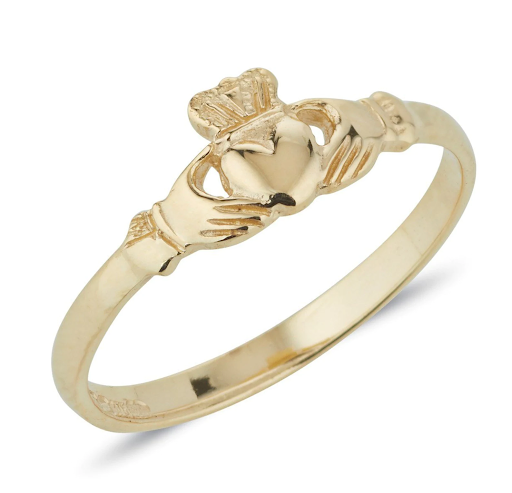
The product is from TheIrishJeweller.
The reason for this detailed image is to clear out any confusion and respond to any questions the customer may have regarding the product. This will make it simpler for the buyer to make an informed decision.
1.2. Studio shot: Against a plain background
The studio shot is your product picture taken against the plain backdrop and nothing more. The goal of this photo is clearly and effectively showcase your product to clients. As you will observe in the picture below the shot from the studio is incredibly easy.
The only thing you should be focused on in this case.
The product is from luxurybyChenxiao.
Beware, there is a concern about common fake white background photos of products. Today, consumers want to see more authentic but clear and crisp studio images of their products.
1.3. Scale shot: Showcase actual dimensions of the item
The most frequent issue when purchasing online is that you are not in a position to determine the accurate size of an item. Although product descriptions might mention the dimensions of the item, images of the item could be misleading.
Moreover, some customers do not tend to read descriptions.
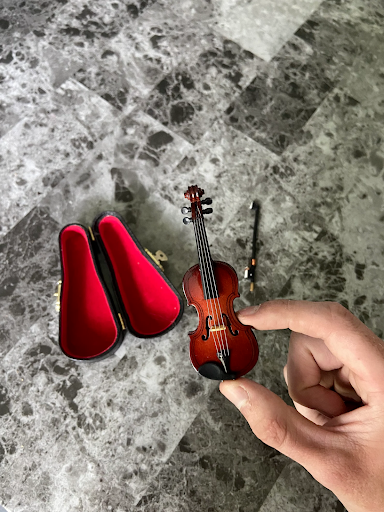
The product is from KyRoman.
Scale shots enable you to assist your customers to get a better understanding of the actual dimensions of the product by comparing it to similar items in their daily lives.
This can help customers see the products they use in their daily routine and improve their confidence when they shop online.
1.4 Process shot: Emphasize the level of workmanship
The process shots could be used to highlight the quality of craftsmanship that was put into the making of the product. Moreover, if you're a hand-crafted seller or designer who creates their own items, explaining the process of making it can be fantastic in terms of establishing trust and relationships with your shoppers.
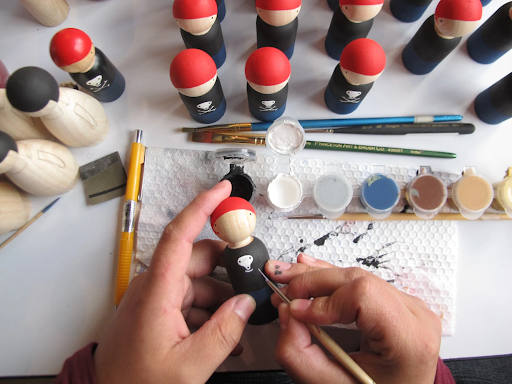
The product is from Goose Grease.
Process shots are also an outstanding way to promote your business on social media.
1.5 Group Shot: The clustered way of demonstrating products
Group shots of products can be used to show alternatives to buyers. These types of images could include multiple versions of items in the group, or the same item that is available in different variations.
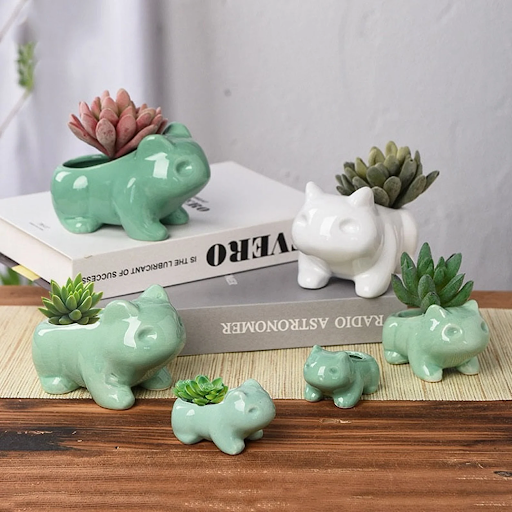
The product is from HappyHomebyNayva.
A grouping is a method to depict the form, variation, and size of the product in a single shot.
1.6 Packaging shot: Making your brand feel to customers
It is unquestionable fact that the clients are taking care of the packaging.
Hence, if the presentation does not make a spotlight the customers, they are not impressed although you might have a fantastic product.
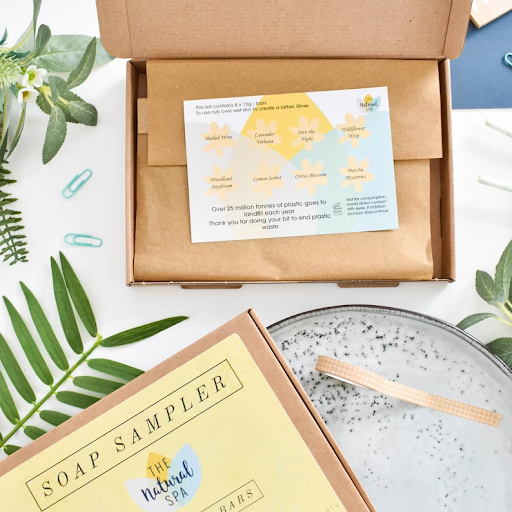
The product is from TheNaturalSpa.
If your products are packaged with attractive, well-branded packaging and branding, then why not showcase them on your Etsy store to give clients a glimpse of what is to come?
2. Select Splendid Backgrounds
The paramount factor when determining the proper background is to select a backdrop that compliments and demonstrates your product but does not distract from it.
So, here are some tips to choose the best background for Etsy photos and create a cohesive-looking shop:
2.1. Prefer Uncluttered Backgrounds Not Busy One
Photographing your items against simple, uncluttered backgrounds keeps a buyer’s attention on your item, not its surroundings. Distracting backgrounds, needless to say, can shift the focus of the image to the background. This isn't beneficial for sellers.
Etsy sellers should avoid choosing a background with a lot of details. Since everyone would like to know more about what they are searching for.
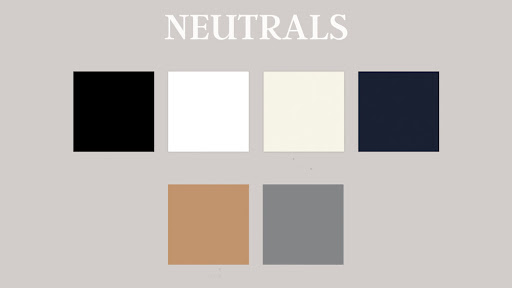
2.2. Select Neutral Colors
The color of the background is of significant importance because it assists in making the item more prominent in the image. For instance, colors that are bright can be very unpleasant when searching for something.
So, it is recommended to choose neutral colors such as white, black, or grey for the background of photography.
The white background makes to be the ideal background for Etsy photography of products. White is the least delicate and neutral color that has a minimal impact on appearance.
In addition, white backgrounds are timeless and never get out of fashion or appear boring. Moreover, it enables products to be highlighted instead of the background.
A Grey background, particularly its lighter shades, is also an ideal backdrop for product photography since it is not overly loud and does not take away the focus of the product.
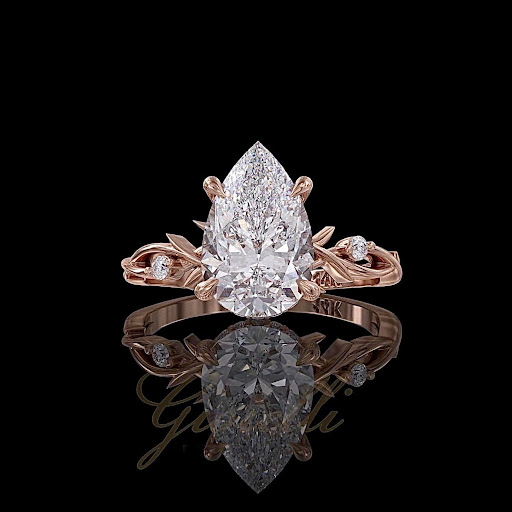
Even though black is the darkest backdrop to photograph, it performs wonderfully for all kinds of items. It is best for products that have a shiny appearance, such as white and silver. It's also great for golden, silver and so on.
For jewelry, a black background makes an enormous difference, making diamonds and other metals appear more attractive and creating a more attractive and appealing image of the product.
💡Bonus: If you are a jewelry seller you should also explore the Etsy Jewelry Box: The Way to Impress your Customers
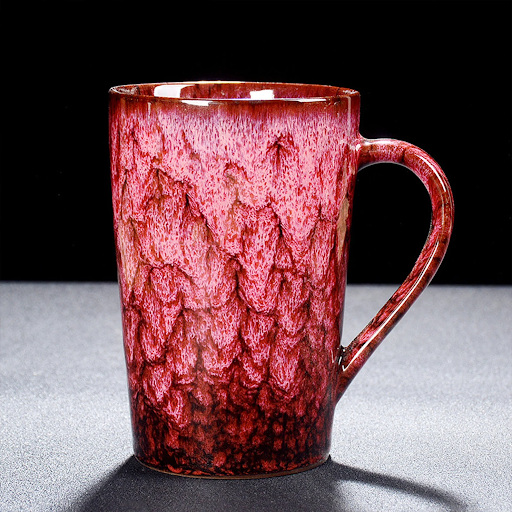
2.3. Texture
Let’s say you do not require a plain background and neutral-colored backdrops for your items. However, you prefer to appear minimal and modest. So minimalistic and refined textures like marble, grids and gradient shades, or any other type of texture are ideal backgrounds for you.
The product is from LazyFrogDesign.
2.4. Consider Outdoor Backgrounds
Outdoor locations are immaculate to communicate the essence of your goods through photos of lifestyle. You can mix outdoor-themed product photos with studio shots and let your customers examine the product from every aspect.
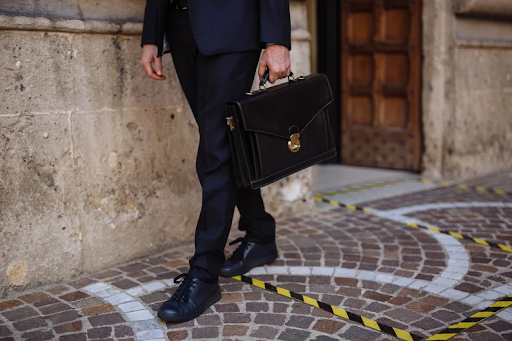
The product is from TheFlorenceLeather.
For example, let's suppose you are selling a leather briefcase. To present the product more realistically, you can take a photo of a businessman in a suit carrying a briefcase outdoors.
To sum up, even though there are many ways to discover, the best background for Etsy products is totally up to you. You should determine the proper backdrops for each item and test them.
3. Style Your Products
Whether you use various colors, props, models, or different backdrops, photo styling is crucial to bring your product into the mind of potential buyers.
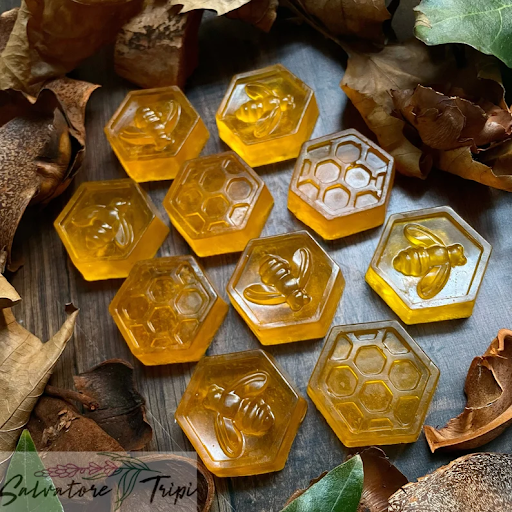
The product is from SalvatoreTripi.
You can convey noteworthy details about your product as well as your company's brand to shoppers by strategically implementing these elements in your Etsy store.
Here are some tips that are in line with the aesthetic of your business and communicate to your targeted market:
- Generate brand-like photography: Define your Etsy store’s style and use elements to reflect your shop’s style.
- Put props near your item: Props assist you with contextualizing the item, so buyers get its intended purpose and visualize it in their own lives. Furthermore, props can serve beneficial functions like showing scale, size, and use.
- Consider using models: If you are selling garments or accessories, real people modeling is a great way to trigger shoppers to view your items and visit your store. Because models help customers visualize the cut and fit.

The product is from marcellanyc.
4. Edit Your Photos
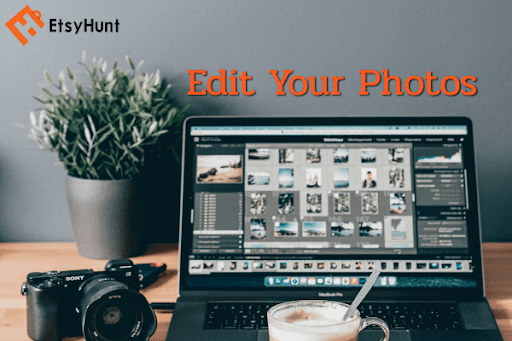
The photos you take may sometimes require editing. Even master photographers may need slight editing. Because simple touch-ups to the shots can make the buyers focus on your product.
You will need photo editing tools whether you are editing photos on your PC or your phone. For the desktop, try free web-based editors like Aviary, Pixlr, BannerSnack, Canva, and PicMonkey.
Some affordable mobile apps include Photo Editor by Aviary and Afterlight. For even more robust features, you can spend money on editing tools like Photoshop and Corel.
⚠️ Bear in mind that using filters and other photo manipulations can mislead the customers and make them unsatisfied. This results in poor reviews. So, do not go overboard while editing.
5. Analyze Your Competitors
Occasionally you can take outstanding product photos simply by being inspired by your competitors. For this, you need to analyze Etsy sellers who sell similar products to your items and have received many reviews.
EtsyHunt customers can count themselves lucky at this point because they can solve this complicated process with one click.
For example, Jason is the seller of handmade leather wallets on Etsy. He wants to get ideas and inspiration from successful stores for Etsy photography of products. Here is the simple guide to follow:
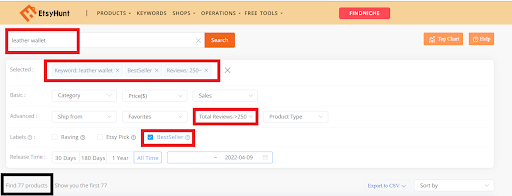
- Go to EtsyHunt Product Research,
- Type leather wallet in the search box
- Check the Best Seller label from the filters and Choose the Total Reviews over 250. Here are the results:
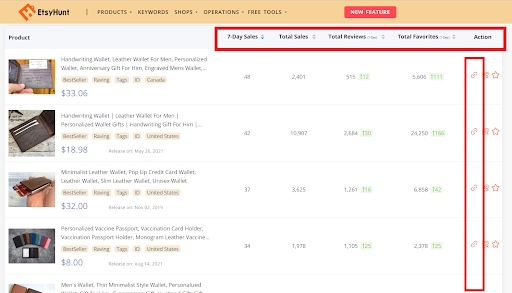
Now, Jason can scroll down to discover Etsy Star Sellers and their product photography strategies. Moreover, Jason can view these sellers on Etsy by just clicking the chain icon on the right.
5 Common Etsy Photography Mistakes
It is deduced from the study that the following 5 common photography mistakes are made by Etsy sellers while listing their products:
5.1 Lack of Enough Lighting
Your camera constantly tries to compensate for low lighting by lengthening the exposure, which can result in blurry photos. Any Etsy seller wants dim photos since these shots can distract potential customers.
💡Tips: Try using a reflector and put your goods near a sunny area. Moreover, consider a white poster board, to direct more light onto your product and eliminate shadows.
5.2 Unintended Flash Usage
If there is not enough natural light inside, the camera tempts to use the built-in flash feature. However, using flash can cause shadows and distort the colors of your product.
💡Tips: Consider using a lightbox or softbox lights to illuminate your item without unexpected flash.
5.3 Excessive Use of Props and Busy Backgrounds
If you use a lot of props in your photo or prefer clustered backdrops, they may confuse possible clients about what exactly is for sale.
💡Tips: Avoid using too many props or busy backdrops, specifically for your primary product image. Keep it plain. Your product should play a leading role on the shot, not an auxiliary role.
5.4. Out-of-focus images
Keep in mind that if shoppers can not see your item clearly, they probably will not purchase. Since unfocused images look unprofessional and can make the shopper doubtful about the quality of the product they are considering, you may lose your sales.

💡Tips: If you shoot by smartphone, you should tap the screen in the area that you want the camera to focus on before snapping the shot. If you have digital cameras, on the other hand, you can hold the shutter button halfway down cue the camera to set a new focal point.
5.5. Not providing all aspects of the item in the picture
If the consumers can not recognize the size, color, or other details from the product image they will not probably buy your item. Even if they purchase, a lack of enough information may cause returns.
💡Tips: Include as many as shots from multiple angles of your item. If your item can make buyers unsure about size, prefer scale shots. Combine different backgrounds like indoors and outdoors shots. If you sell garments or accessories, consider using a model in order to make the buyer’s mind crystal clear.
Final Words
Etsy sellers should build a proper strategy to boost sales. There are many ways to accomplish this. However, one of the vital factors is to find an answer to the question of “How to take photos for Etsy? ”
In this guide, we covered tips, tricks, strategies, real-life experiences, and common mistakes for Etsy Photography of products. We can conclude from the article that It is inevitable to draw buyers’ attention after generating charming product photography methods, discovering the best tool, and combining them with Etsy rules.
EtsyHunt handy tools will always be with you in the journey of your Etsy success story.
Scale Your Etsy Business Now!
60,000+ people have used this free Etsy seller tool. Are you next?
Get Started for Free